What the Runpod card is
Some articles have a card like this.

Click it and you can start, on a cloud GPU, a ComfyUI that already has everything from that article: the workflows, models, custom nodes and sample images.
Every time a new model comes out, you download tens of GB of models, install custom nodes, run out of VRAM and crash… it gets tiring, doesn't it.
This card skips all of that and gives you an environment that just works, for sure. Use it when a model is too much for your own GPU, or when you want to see it run before installing anything locally.
Runpod and Pods
Runpod is a service where you rent cloud GPUs by the hour.
Each machine you rent there is called a Pod. Think of it as renting a PC with a GPU for just the time you use it. You pay only while you have it, and the charges stop when you give it back.
Normally you decide which GPU it has and what software goes on it yourself, but the card leads to settings prepared for that one article. The only thing you choose is the GPU.
The overall flow
- Create a Runpod account and buy credits
- Create a Pod from the article's card
- Wait for it to get ready
- Generate in ComfyUI
- Delete the Pod when you are done
1. Account and credits
Runpod has no free trial. You buy credits first, and what you use is taken from them.
- Go to Runpod and
Sign Up - Buy credits from the
+at the top right
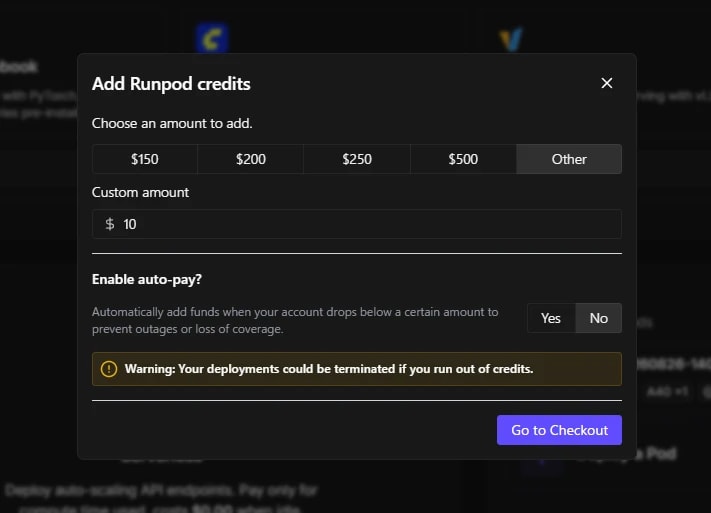
There is no need to put in a lot at once. To generate a few images and get a feel for it, 10 dollars is plenty.
You don't have to use it, but here is my referral link.
If you create an account and buy credits through it, you get some extra credits. I get a few credits too, and I use them to test things for this site m(_ _)m
2. Create a Pod from the card
Click the card in an article and Runpod's screen for creating a Pod opens. Everything else is already set, so all that is left is choosing a GPU.
- GPUs with a ★ are the ones that run that article's workflows comfortably
- They are sometimes unavailable, and any other GPU is fine too
- Once chosen,
Deploy Pod
Each GPU shows its price per hour. Pricier GPUs are faster, but paying twice as much does not make it twice as fast. It comes down to your wallet.
Charges start the moment you press
Deploy Pod.
3. Wait for it to get ready
Getting the Pod ready takes a little while. Watch the progress bar and wait.
When it is ready, Port 8188 → ComfyUI appears under HTTP services in the Connect tab. Click it.
A preparation screen opens first. Behind it, the models for the article are being downloaded all at once. When everything is ready, it switches to ComfyUI on its own.
It takes about 3–4 minutes from clicking
Deploy Pod. I have done a lot to speed it up, but with how Pods work, this much time is unfortunately unavoidable.
4. Generate in ComfyUI
When ComfyUI opens, every workflow in the article is already open in its own tab. The sample input images are there too, so you can just press Run.
If you close a tab, the same workflows are in Workflows in the sidebar, so you can open them again from there.
Of course, you are free to change the prompt or load your own images from there.
Only the models that article uses are downloaded, but ComfyUI Manager works too, so you can add other models or custom nodes and try other workflows.
Generated images stay only inside the Pod. Download the ones you like as you go.
5. Delete the Pod when you are done
When you are done, Stop the Pod on its screen, then Terminate (delete) it.
The Terminate button appears after you Stop. Stopping alone already stops the charges, but everything inside is erased, so restarting it later means starting over anyway. Go all the way to Terminate.
If you forget, the Pod deletes itself after 30 minutes with no activity and no generation. A notice appears at the top of the ComfyUI screen 5 minutes before.
Terminatedeletes your generated images along with the Pod. Download any images or videos you want to keep first.
When you want to use it again, just create a new Pod from the article's card.